This morning as I was thinking about what I should blog about today I decided it would be fun to put together a little crochet cup cozy tutorial for y'all! Well, 6 hours later I finally finished it! No joke ;) I should become a better planner!


So, I had a lot of fun with this tutorial. I am typically a 9-5 coffee drinker...an IV couldn't give me enough of the good stuff! Well, after I found out I was expecting, coffee consumption rapidly came to a slow and I picked up other hot drinks instead. The moral of the story basically is that I go through at least one coffee mug a day.
This being the case, I have been seeing so many awesome patterns for crochet cup cozy's out there. I thought it would be fun to put a little tutorial together to show you how to make your very own custom crochet cup cozy!
What you will need:

Yarn! I started off with 4 different colors, but only used in 3 in my finished sample. Scraps work out fantastically for this project! I used a size H/5mm hook for my cozy and worsted weight yarns. You can use whatever suits your fancy! You will also need 1 button.

I chose this mug because I love it. Dustin has a matching Mr. mug with reversed colors. We got the set as a belated wedding present from my Mother-in-law, and we use them all of the time!

Next, I took the measurement around the middle of the mug. To be perfectly honest, it felt good to measure something that wasn't how much my waistline has expanded ;) Not that it's a bad thing. We can measure the mugs waist instead.

Ok, here is the part where I kind of screwed up the first time around (hence the unplanned extra hour of work I created for myself!). I used a foundation single crochet for my first row, and forgot that the stitch pattern I wanted to use doesn't stretch one bit. It actually shrinks down your original foundation chain or foundation single crochet. I started out with 8 inches and had nearly finished my first cozy before I realized that my length had shrank to 7.5 inches! Moral of the story, chain or foundation single crochet to a measurement that is either exactly as wide as your mug or 1/2 inch shorter. Any smaller and you won't be fitting around your mug!

You will be fastening off after you have your proper number of stitches! It doesn't really matter whether or not you have an odd or even number of stitches for this stitch pattern you will be using.

Next, you will be joining your second color with a slip stitch into the first stitch of the foundation on the right side of your work.


Chain 1, and single crochet into the same stitch you joined into, chain 1, skip the next stitch, single crochet into the next stitch, chain 1, etc. to the end of your row. If you come to the end of your row and still have an extra stitch, single crochet into that stitch as well.


Once you have reached the end of your first row, you will fasten off.

Join with your third color the way you did in the previous row, and this row you will single crochet into the chain-1 spaces and chain 1 and skip the single crochet stitches.

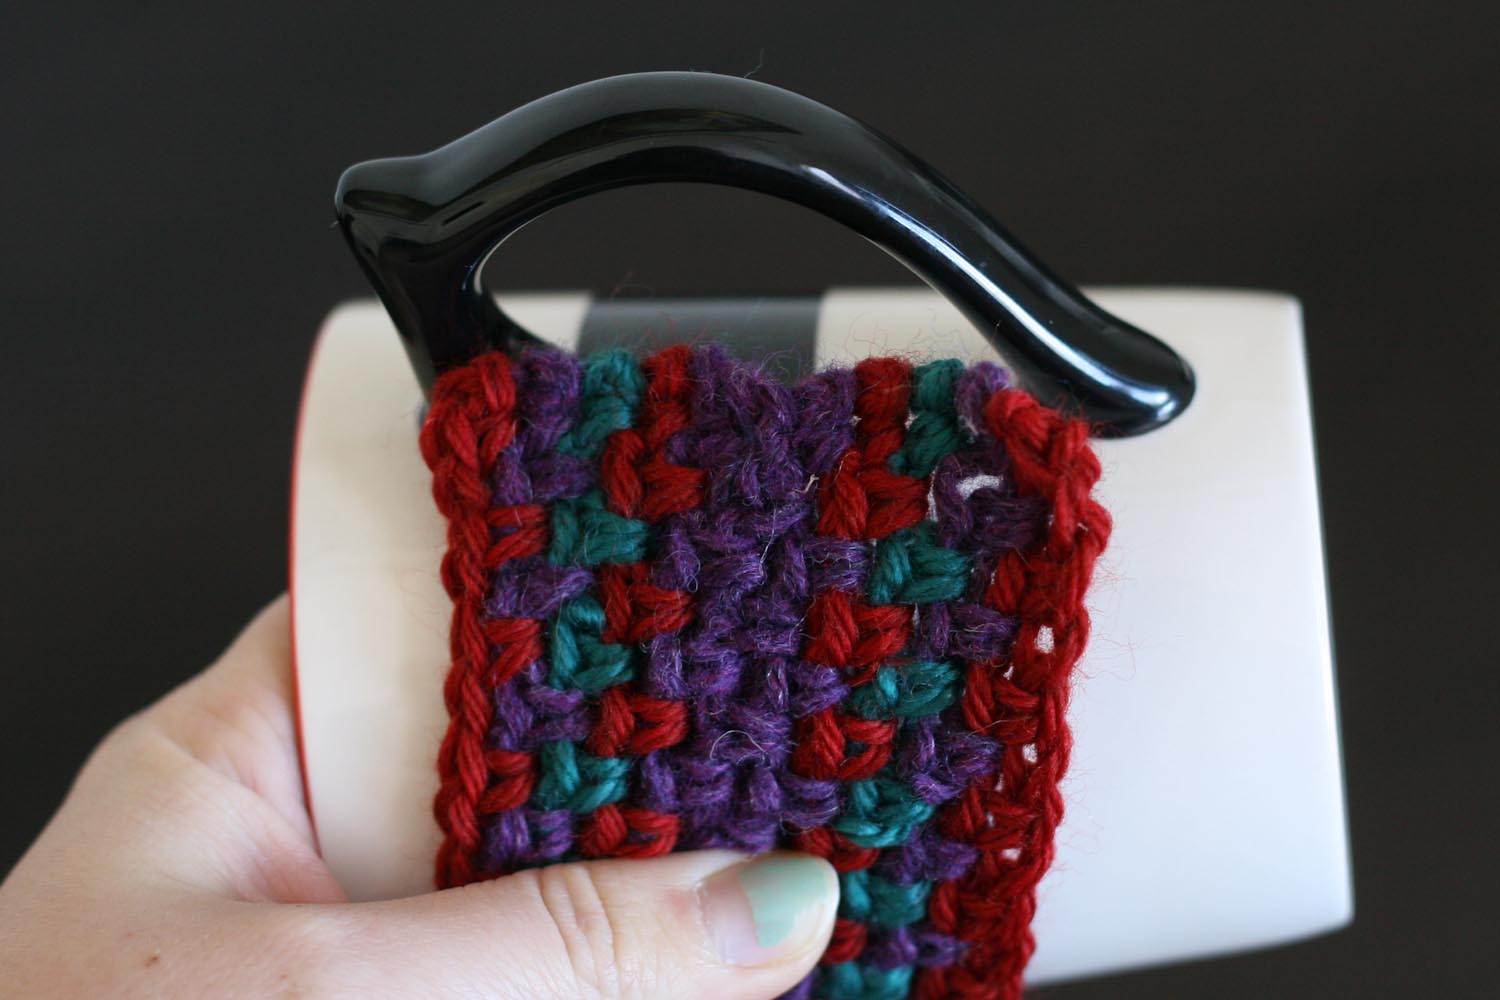
As you can see, this is the cozy I made that actually fit my mug :) My color patterning went like this:
Row 1 - Red
Row 2 - Purple
Row 3 - Green
Row 4 - Red
Row 5-7 - Purple
Row 8 - Red
Row 9 - Green
Row 10 - Purple
Row 11 - Red
You can do any color pattern that you like though!
I made enough rows to make my cozy as long as the inside measurement of my cozy handles. You will be adding a trim around the bottom and top, the extra length will be perfect for your mug!

Flip your cozy bottom up, and along the bottom of your cozy, join your yarn as you did for each row close to the upper left hand side. Single crochet into each chain space and chain 1 between the single crochets.

Chain 3, and then continue in the single crochet, chain 1 pattern stitch across the rest of the bottom of the cozy.

Slip stitch into the first single crochet to join. At this point, you may use a reverse single crochet row or a standard single crochet row to complete the edging.

Next, you will turn your work right side up and act like you are adding an extra row to the top. When you have reached the edge of your work, chain 18 (or however many it takes to bridge the gap between your sides and create a button loop).

Remove your hook and insert it so the wrong side of your chain is facing you.

Insert your hook into the last single crochet in your row.

Complete your reverse single crochet. Reverse single crochet in each stitch across. Or, you may attach your loop with a slip stitch and fasten off, then go back and add one more row of standard single crochet. It's up to you!


Now comes the fun part! Grab your awesome button (I just pulled something out of my vintage button stash. I recommend using something bigger than this!) and attach it in the corner on the opposite side of your button loop.

And Voila! You have made your own perfectly custom crochet cup cozy! Hopefully all of my directions make sense, I'm definitely much more of a straightforward pattern writer, I'm not used to writing "recipes" like this!
After I used my cozy on a hot mug, since I used wool or wool blend fibers, it definitely blocked itself out a bit. I like it a lot, and maybe I'll make a matching french press cozy one of these days!
I hope you have enjoyed my crochet cup cozy tutorial! Let me know if there are any other tutorials you'd like to see me put together in the future!
Happy Crocheting!
Chelsea
I have a french press that needs a cute cozy...
ReplyDeleteI love this! Thank you for the wonderful tutorial. I really love your color combo on this too. Very nice!
ReplyDeleteI love this! Thank you for the wonderful tutorial. I really love your color combo on this too. Very nice!
ReplyDelete